This semester EVERY student (NOT A GROUP PROJECT) will be responsible for disassembling and reassembling a small engine supplied by DHS. These engines are Honda clones and are Over-Head-Valve slant single cylinder in design.

The engine MUST run before dis-assembly note:(worth marks, initial test run, diagnose issues) and RUN after assembly (marks).
THIS IS IMPORTANT: FINISH ANY OTHER PROJECTS YOU ARE WORKING ON BEFORE YOU START THIS. We need the space.
Also:
YOU ARE RESPONSIBLE FOR EVERY PART AND FASTENER ON THE ENGINE YOU CHOOSE. BE ORGANIZED! SECURE YOUR PROJECT IN THE PROVIDED BIN. CLEAN YOUR WORK AREA DAILY. TAKE Personal PICTURES OF YOUR PROJECT PROGRESS BECAUSE THESE PICS WILL BE NEEDED FOR YOUR FINAL PACKAGE. Pictures that are duplicated in two or more student packages. Marks will be deducted from all students involved.
FINAL RUNNING ENGINE IS WORTH:……….60% With all assembly checklists. Cylinder measure, piston measurement= clearance
FINAL PACKAGE WITH PICS AND CAPTIONS (designed as a Repair Manual) IS WORTH:…..40% Details on this package will be noted below.
Before you start RIPPING bolts off of your engine:
- The serial number of the engine must be recorded with your teacher. It can be found here:
 You will be given a tag that represents your engine serial number. Your teacher will hold onto the main tag and you will receive the tear off. Do not lose this tear off TAG, it is worth marks!!! The engine that is tagged to you will be submitted for final evaluations.
 - Next remove the fuel tank and put it into the supplied storage area. Make sure all fuel is vacated from the tank. Do not RIP the fuel line off of the tank or break the tank fitting. Be careful it is a plastic fitting. There are two nuts and one bolt behind the spark plug cap that is horizontal and a 8 mm head to remove the tank.
- NOW…. Test your engine. Move it to the test area and bolt it down with the four bolts provided. Diagnose any issues. Hard starting, idle and govenor issues. Start it at half throttle. Turn the choke on. Be familiar with the operation panel. It should NOT over REV!!!! Engines that over REV can be FATAL!!!! If an engine does over REV. HIT the KILL switch. If that doesn’t work. PULL the spark plug cap off (they are insulated, you will not be shocked). DO NOT panic and follow the simple steps above.
- Remove your spark plug cap and give it to your teacher. You will get it back after your engine is reassembled and has gone over a visual inspection.
- Drain the oil in the supplied containers because it will be reused if it is not contaminated.
- Begin engine dis-assembly. start with all the parts surrounding the engine block. Put bolts back in holes after parts are removed. When you remove the side cover be careful not to rip the gasket. do not lose the govenor button Note: DO NOT REMOVE THE RINGS FROM THE PISTON. THEY CAN BREAK AND THEN YOU WILL HAVE NO COMPRESSION. These engine have no hours and the rings will be fine anyway.
- The internals….
- Once you have a visual of the side of your engine open there are some things you should pay attention too.
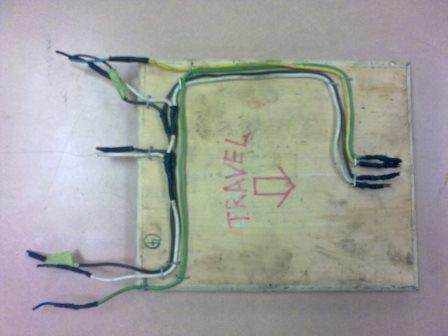
- Govenor button is a white plastic part that controls engine speed. One of the most important parts of a good running engine. It will FALL out and you will not know where it came from. Under it is thin black shim. It is controlled by fly weights and measures crankshaft speed that is transferred to the throttle lever and then the throttle plate. Don’t lose these parts. The govenor shaft that goes through the block above to the govenor lever has a “R” clip on it. Leave that in place. Notice the slot in the shaft. The “R” clips flat side fits in this groove. Leave the “R” clip in place, the govenor shaft and the govenor lever, this it tuned to your engine so it can rev up (not over REV) and go back down to idle. Very important for the final run!!!
- Clean all your parts.
- Bring your block and piston up to the desk for measuring the piston and cylinder. Worth MARKS.
- All assembly torque specs. are listed on the white board in the shop. Use the specific torque wrench for each application that is pictured beside the spec.
- After your engine is tuned to run at idle and full rpm without over revving. See your teacher and tag your engine with the original tag with the wire attached that you handed in originally and place it on the shelf. The serial numbers should match.
- What to hand in FINAL PACKAGE:
- A title page with a project name, course code and your name centered on the page. Also a picture of the completed engine. Also The tear of tag from your original service ticket must be stapled somewhere on the second page.
- On subsequent pages. Start with the dis assembly process. Using the personal pictures you took during the dis assembly process, put a caption explaining your process beside or under each picture until you are at the parts cleaning stage.
- Assembly. Use the remaining of your pics with captions to explain the assembly process and testing of your engine.
- All this should be completed with a minimum of 20 pics with captions. More would be better to explain your process for more marks. Keep the process organized.